
As it turns out, the time that it takes to learn something new is closer to 20 hours—compared to the widely held belief that it takes 10,000 hours to master something new. So how do you use the first 20 hours to maximise your online learning team’s use of a new online learning platform?
We've gotten a few questions from project managers and team leaders about how to train their online learning team once they've subscribed to the OpenLearning platform. In this blogpost, we've got you covered with a sample training agenda from our own Onboarding Team. Let's get right into it:
One simple hack for a smooth training session: Provide all the training materials and content inside an OpenLearning course. You can invite all the users to the course and keep it open, so that they can always access it at any time to refresh their memory.
Before the training session happens, ask each user to create an OpenLearning account. It’s best to ask them to create their own account as it’s more personalised and reduces the time you’ll spend managing their accounts later on.
When they have created their account, ask them to enrol in the course you have created—we recommend making a class with an activation code for this.
If you do decide to create your team’s accounts on their behalf, let them know that they must update their passwords on the Account Settings page for security purposes. It’s also a great time to encourage them to add a profile picture and write something about themselves under ‘My Profile’.
One of the great things about the OpenLearning platform is the Course Marketplace (pictured below)..png?width=690&height=381&name=OpenLearning%20Course%20Marketplace%20(1).png)
Learners can use the Marketplace to choose from thousands of online courses from around the world. Before hosting the training session, encourage your users to enrol in a few free courses—this will help them to become more familiar with the platform from the learners' point of view.
Every participant should already have their own account enrolled in the course that you have created. Now, they'll be entering your training room to face a whole day of learning together—so it's important to make sure everyone is comfortable and warmed up for the session.
Once they are settled in, group them into teams. This way, the participants can learn from one another during the training. It’s best to group them into teams of people that they are not familiar with.
You can also treat this as an ice-breaking activity similar to the game ‘Taboo’ where participants must figure out who is in their team based on randomly assigned categories such as animals, colours, or countries. The catch is: they cannot say the name of their assigned animal, colour or country.
This is a great way to warm up the room—even if they know each other already—because it’s a fun way to build rapport and expand their social circle.
Before the participants learn how to use the course editor, it’s a good idea to give them a recap of the OpenLearning platform to reinforce their familiarity with it, such as:
Next, introduce the OpenLearning platform. Here are some talking points that you can use:
You can also get your team excited about using the platform by sharing the 6 Reasons Why Online Course Creators Choose OpenLearning.
Once your team is ready to start learning about how the platform works, give them an overview of the hierarchy of portals, qualifications and courses on OpenLearning. Here’s an infographic you can use: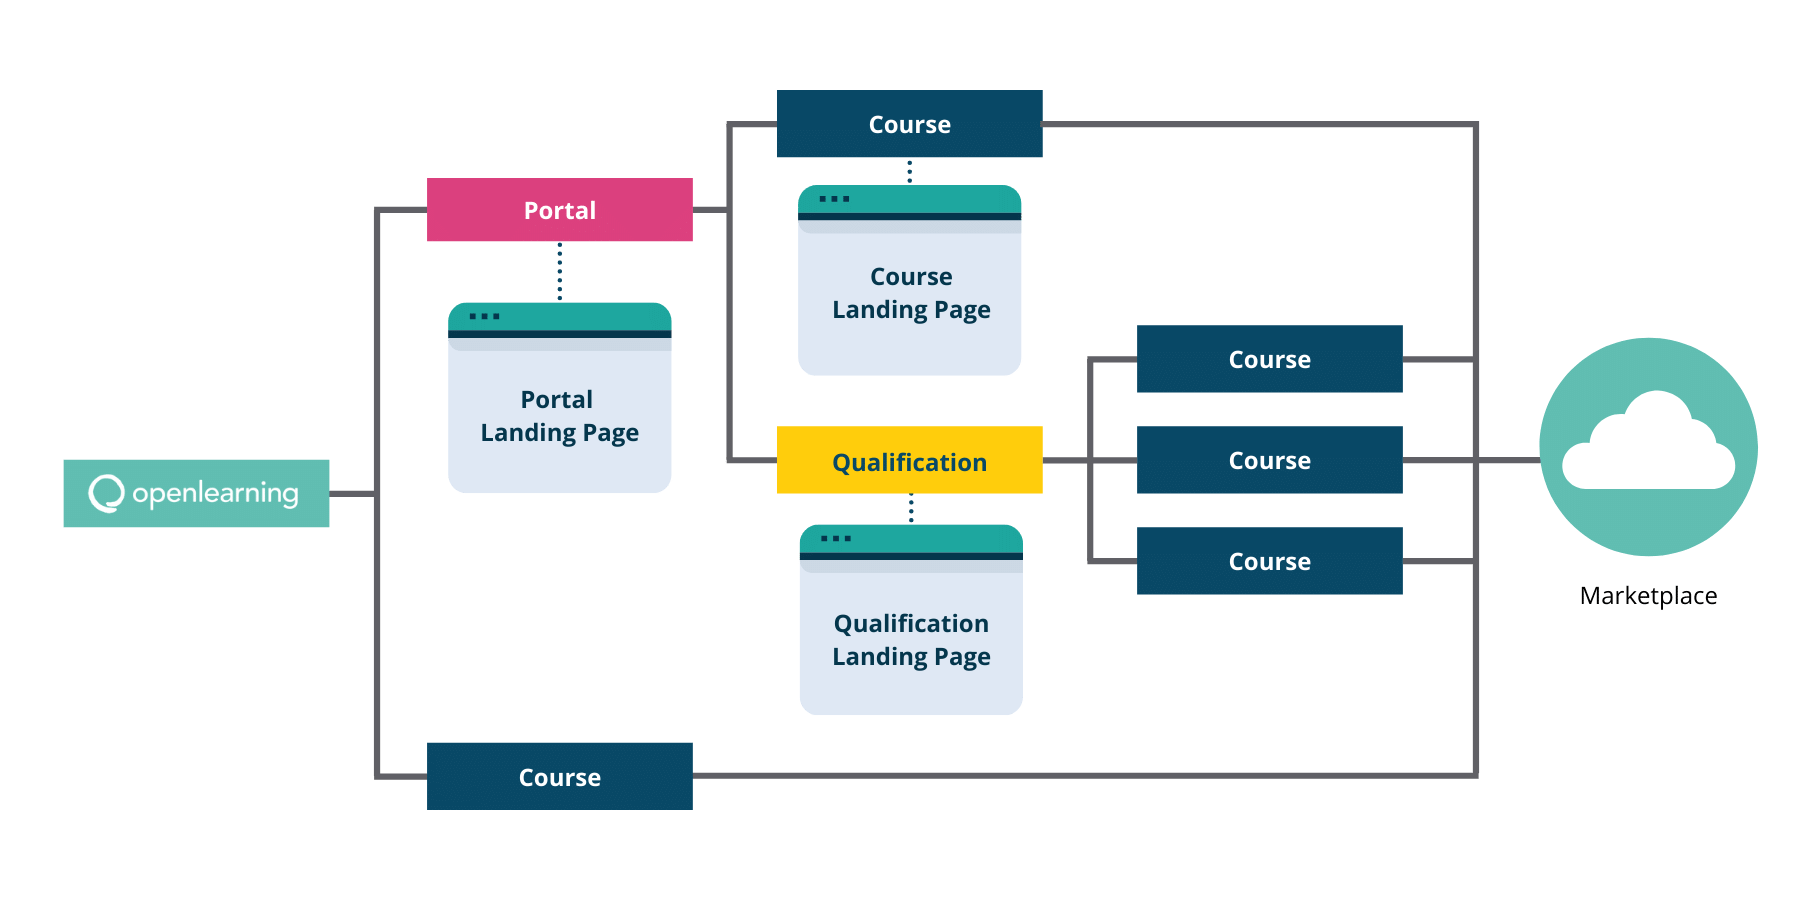
Then, explain the roles that are available in a course. There are 5 roles in every OpenLearning course, including the learner's role: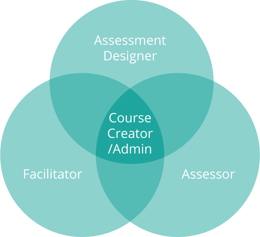
A Course Creator / Admin has the highest level of permissions available within a course. They can add, edit and remove content, create activities, manage course settings, along with add, edit or remove other users' roles within the course.
A Facilitator can access the Administer Students tab and has the ability to enrol students, check student progress and engagement, set up and remove pre-enrolment questions and manage the course's timeline.
An Assessment Designer can access the Assessment tab and has the ability to create assessment reports and customise the alignment of activities to learning outcomes.
An Assessor can access the Assess Students section of the Assessment tab and has the ability to review and evaluate student work via reports created by assessment designers.
Learners can participate and view the contents of a course. They are not able to change, modify or assess the course (unless they are using the Groups function for assignments)
Before creating a course on OpenLearning, it's best to encourage your team to plan out the structure of their course. This is to help ease the course development process.
Note that OpenLearning is a social-constructivist platform—therefore, the platform is built to enable social learning experiences.
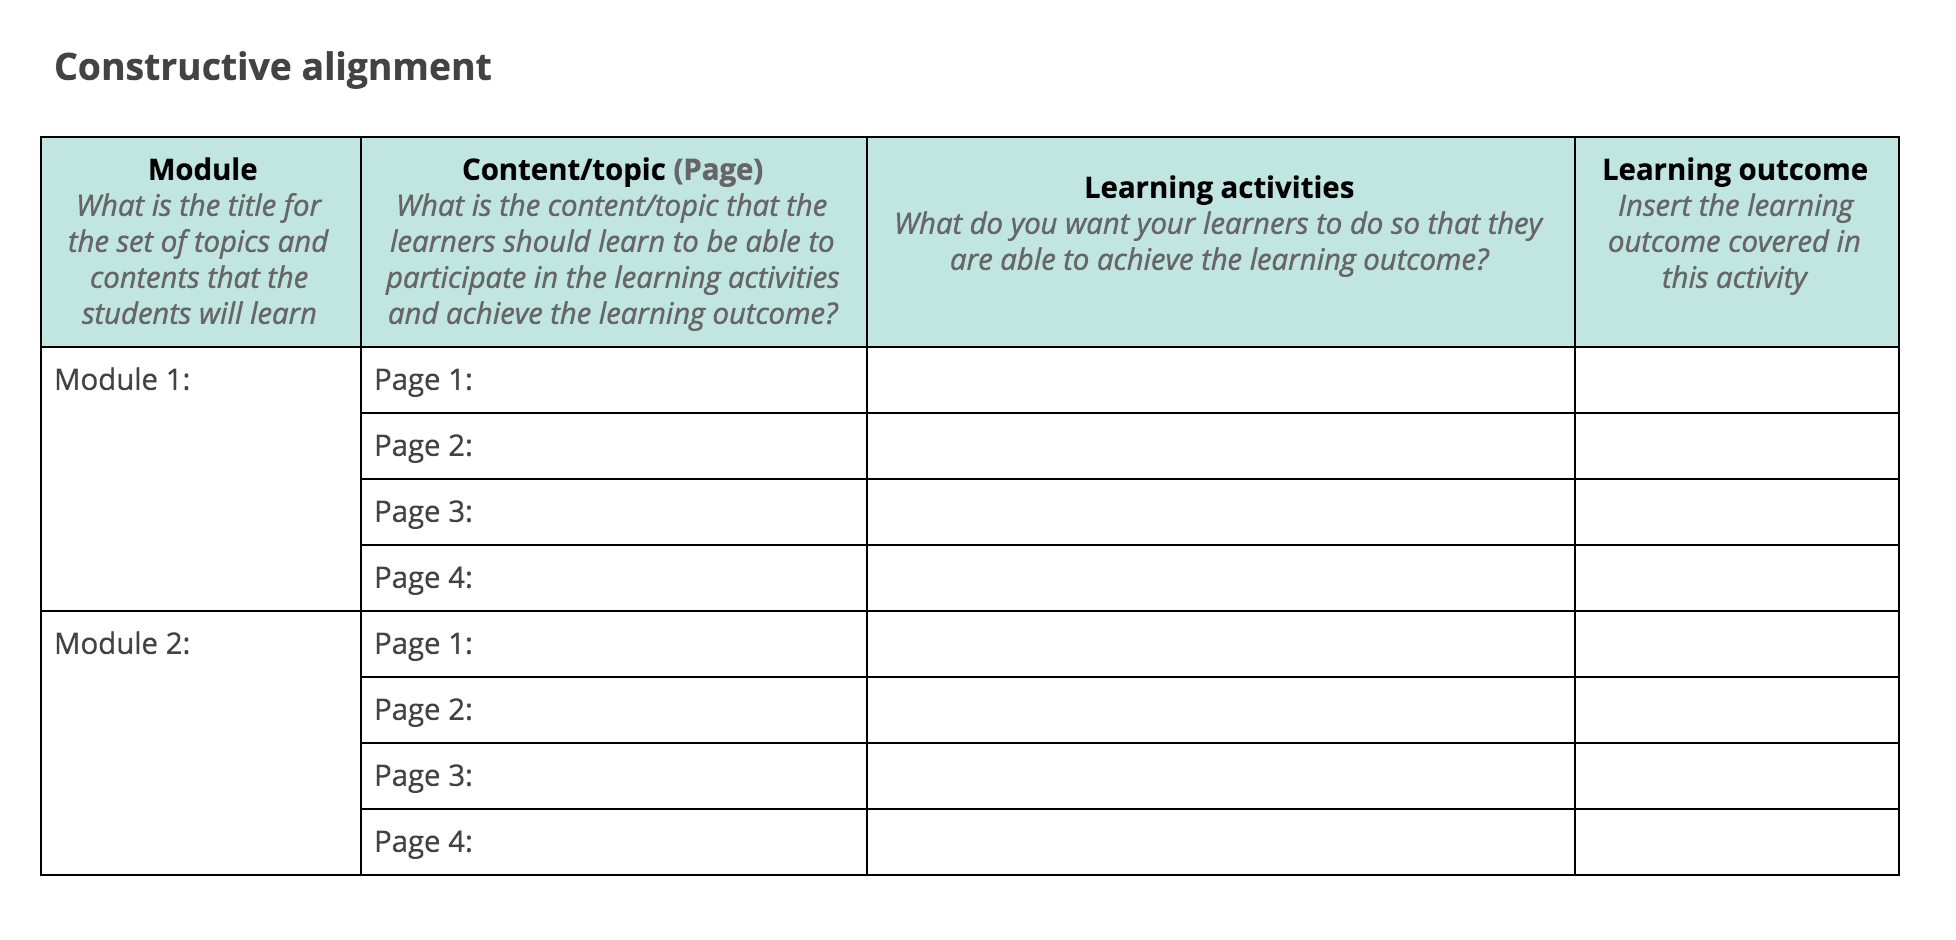
That’s when a constructive alignment plan becomes important.
Why do you need a constructive alignment plan? It streamlines the course-building process and is the best way to ensure that your learning outcomes are closely linked to the content and activities in your course—making it easier for learners to achieve them. It is also of significant value to OpenLearning course creators as this would benefit them when they need to tag their assessments later on.
We’ve provided an online course design template called the Course Design Document (CDD), which you can provide during the training. The document helps structure all of your information and content into one document (pictured below):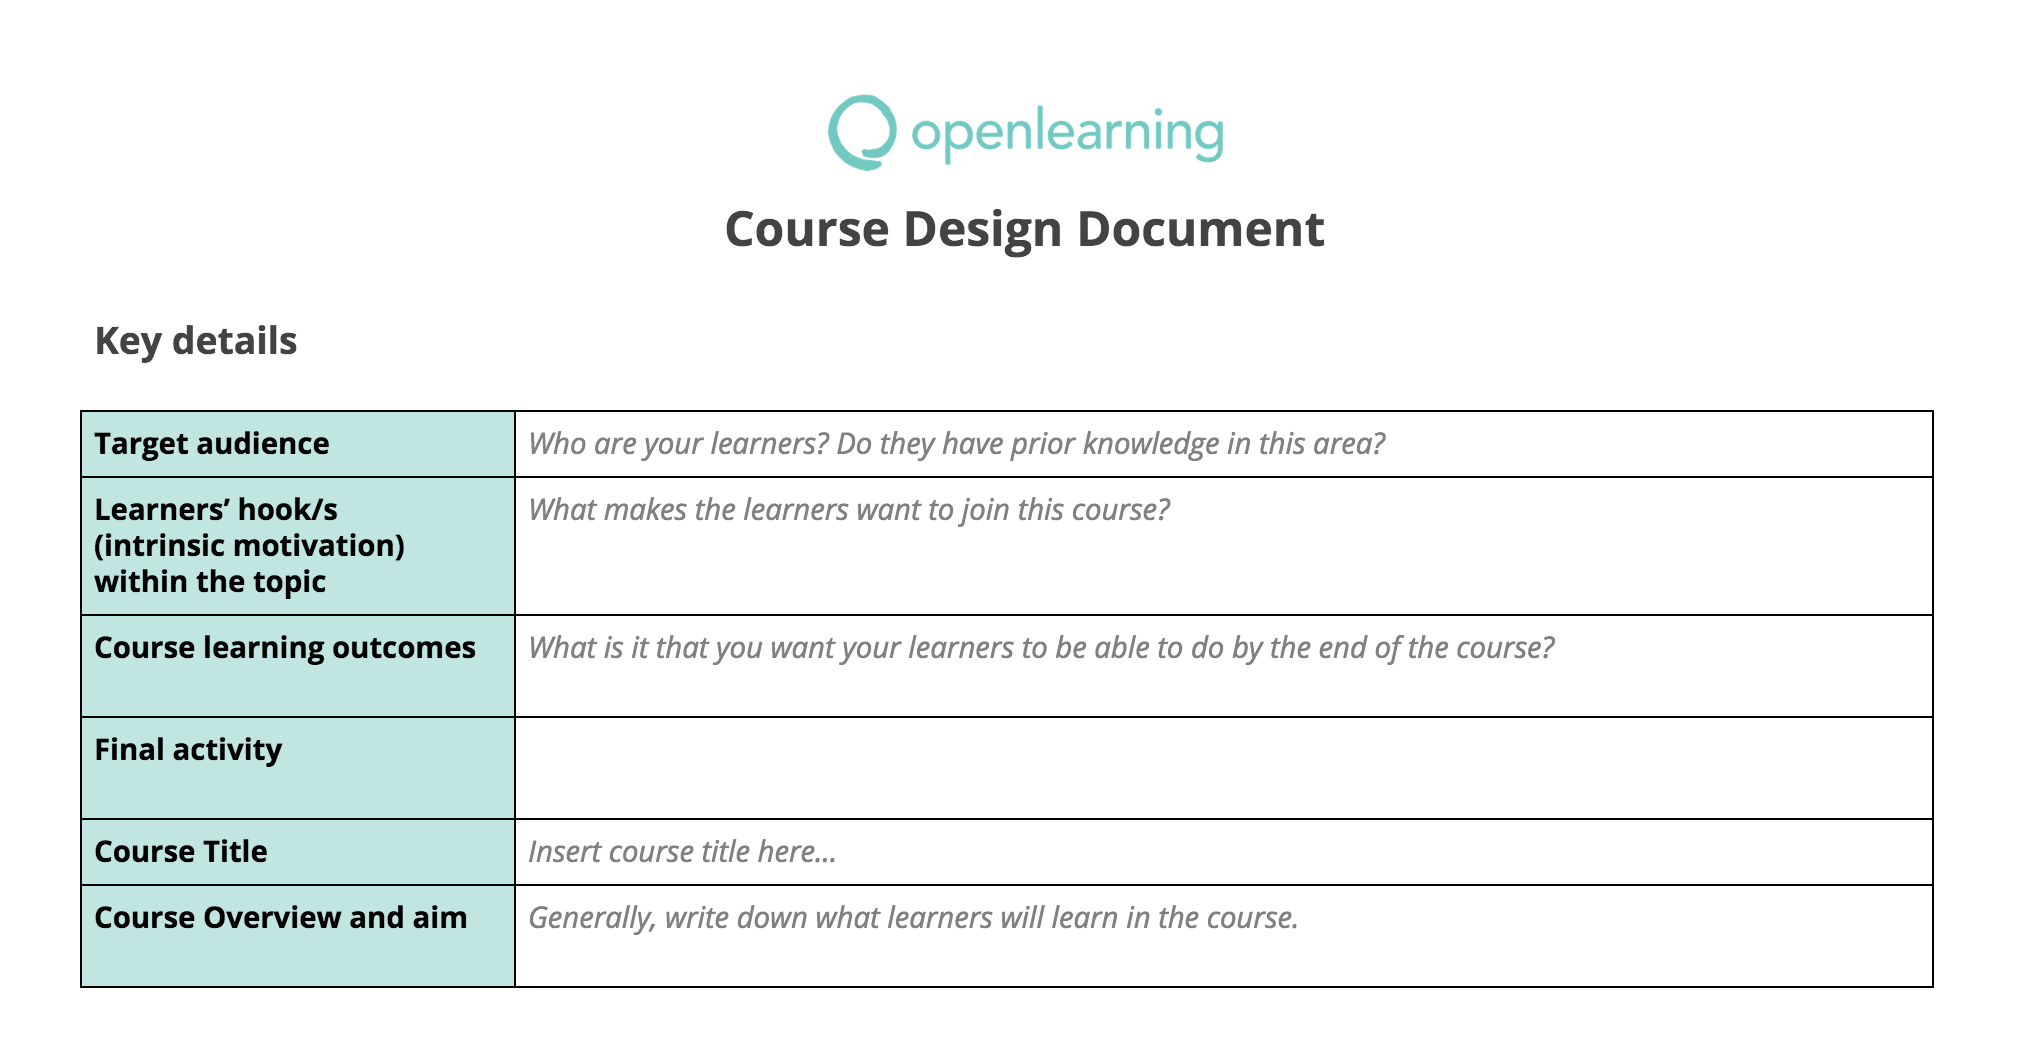
At this stage, it’s best that you give your participants some time to do this on their own. Provide the document for the participants to download and complete based on their own content.
Now that their courses are structured, it's time to create their course and choose a course URL on the Create a Course page: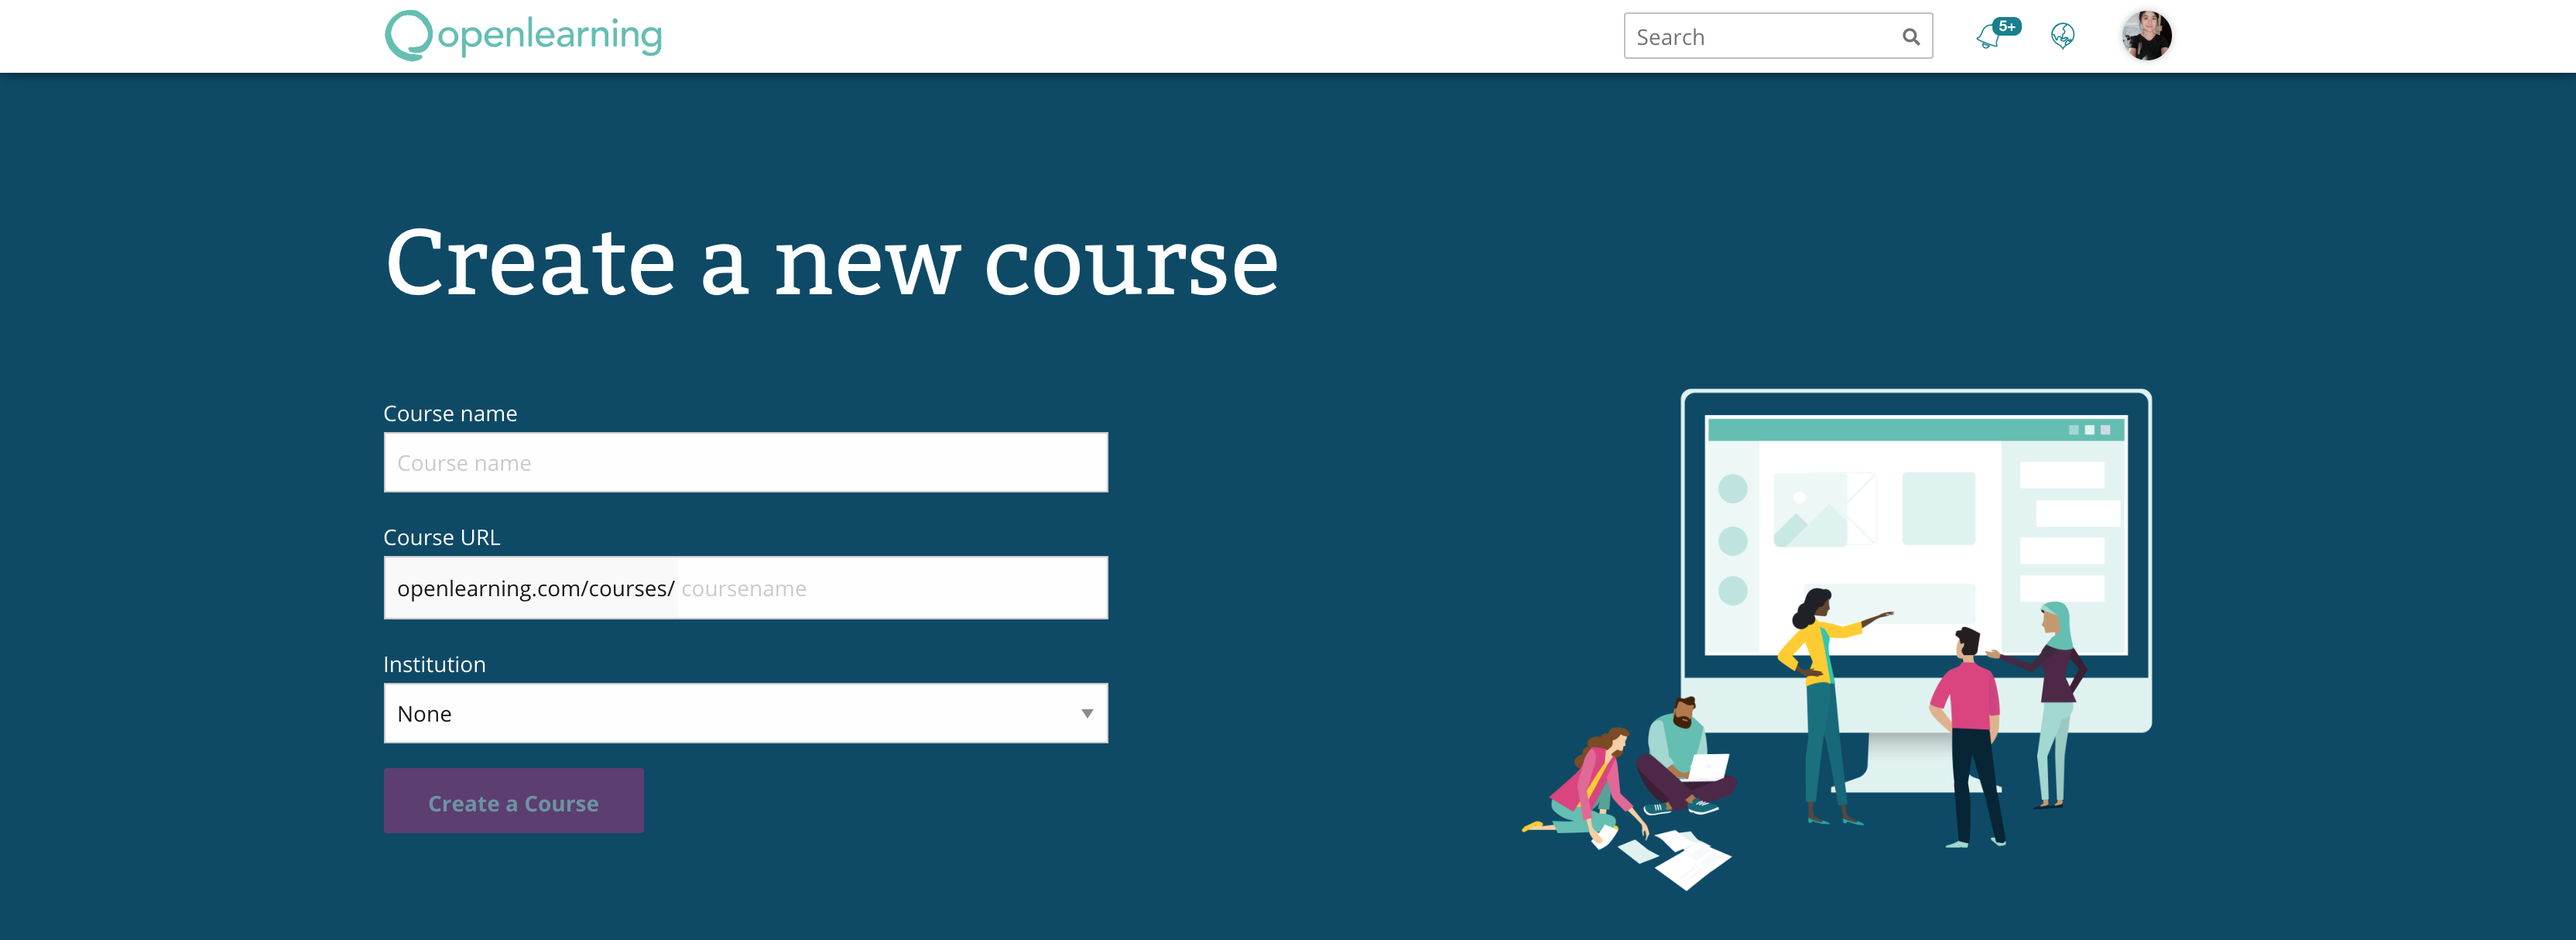
Note: You will need to make sure that educator accounts are part of your institution portal, in order to gain educator privileges. Users that aren’t in the institution portal will need to sign up for the trial version of OpenLearning.
Let your team know that the course name can be changed at any time, but the URL is permanent. Pro tip: Keep the URL short and simple so that it is easy to remember (and to type!).
To get started with adding content and activities to their course, they will first need to set up the outline: this consists of the module set, modules and pages of a course (pictured below).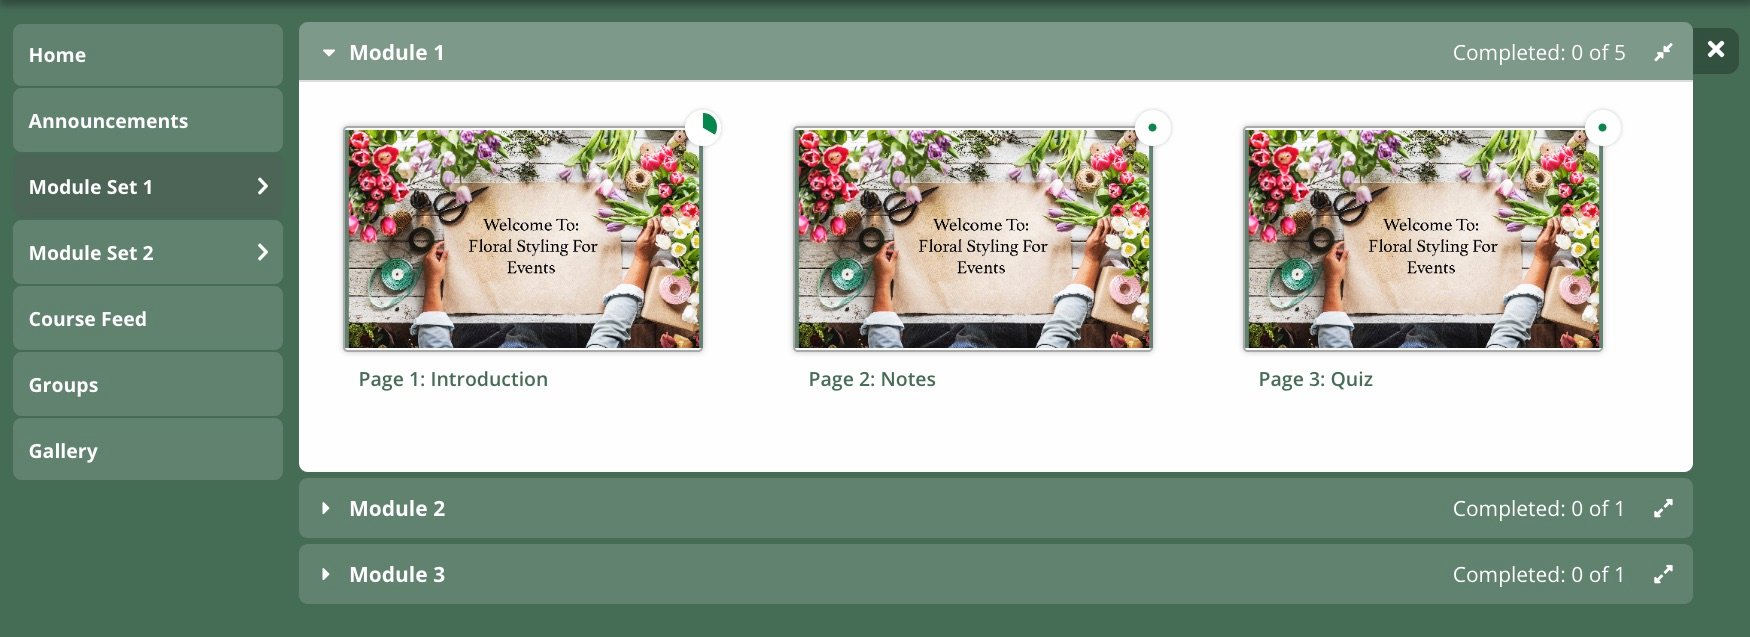
Some course creators prefer to make several module sets corresponding to the weeks in a semester, ie. Week 1, Week 2, and so on. Others prefer to have just one module set called Learning Activities. Let your team decide which would be best according to the course plan that they have produced.
Now that the course outline is set up, you can prompt your team to start adding content and activities—but first, they will need to know about widgets and their uses. You can take this opportunity to explain that widgets are the building blocks of any page, and walk them through the various types of widgets available.
The OpenLearning platform offers over 30 widgets, or tools, to help you build an online course. One such tool for setting up divergent learning activities is the Post Widget. It works with the Collection Widget to provide a space for learners to share their work with the class, gain feedback, start discourse, or engage in other social-constructive activities:

Once you have shown your team the widgets, you can ask them to try it out for themselves by building an icebreaker activity. This is an activity that any online course creator should be able to build—since your learners won’t be meeting face-to-face, icebreakers are a necessary first step for them to feel comfortable learning together.
An icebreaker that we like to use at OpenLearning is the "Spot the Unicorn" game. This is usually played in the comments section on the course homepage. We use the Text Content Widget to ask learners to share 3 facts about themselves, one of which is false (the "unicorn") while the other two are true. Their course mates must then guess which one is the unicorn. It's a quick and easy way for people to get to know one another in the course.
We live in a time where no matter how interesting or effective your course content and activities are, learners will still be disengaged if the visuals are lacking. Contrary to the title of this section, it's not just about how 'beautiful' it looks, but also about navigation and accessibility.
Help your online learning team to see that a well-placed icon could spell the difference between a learner having the most fulfilling experience of their lives—or clicking on the wrong button and dropping out of the course completely. Even something as small as the colour contrast between a piece of text and its background could be a deal-breaker for some learners with visual impairments.
There are many platforms to help you find great images (e.g. Pexels, Unsplash) and icons (e.g. Freepik, Flaticon and The Noun Project) for your course. Just be sure to check the Creative Commons license (CC0) of any images used in your course to avoid copyright infringement. We've also created some icons, numbers and buttons that your team can use to help learners navigate through their courses:


Run your team through the settings available in the Course Setup tab on the left sidebar.
Under 'General', they will be able to turn their course online once it is ready. The Setup Wizard will help them to determine whether or not they are ready to go live. This is important! Without turning the course online, they will not be able to invite students to their course or share the link with anyone else. 
Under 'Timeline', they can set their course to be an Open MOOC, Self-paced or Scheduled, which indicates the time period that your students can access the course:
We prefer the Open MOOC setting because learners who have enrolled will be able to access the course content at any time. This fits into the original idea of the Massive Open Online Course (MOOC), where leaners can study at their own pace and are empowered to choose when and where to learn.
Under 'Landing Page', they will be able to set up a webpage which they can use to market their course. It will have a 'Join Now' button for learners to enrol in their course and can include other important information e.g. learning outcomes, what to expect and contact details.
Once you've run through the agenda above, your online learning team should have a good understanding of the OpenLearning platform. Now, all that's left to do is support them as they continue to build their online course.
Course creators should feel that they will continue to be supported after training. It's a good idea to let them know about any of your university support channels, alongside our own OpenLearning support:
And that's it! I hope your online learning team's training session goes smoothly. Let me know in the comments if you've used this training agenda and whether it worked for your team.
OpenLearning is a social online learning platform that can help you and your team to achieve your institution's goals. 


